How to Use Iron-On Trim Tape PVC Edge Banding
/0 Comments/in Decorative Panel/by Furniture_DecorIron-on trim tape PVC edge banding is an essential tool in the world of furniture making and woodworking. It offers a seamless and durable finish to the edges of various furniture panels, particularly those made from particleboard, MDF, or plywood. This article will guide you through the process of applying PVC edge banding.
Understanding the Importance of PVC Edge Banding
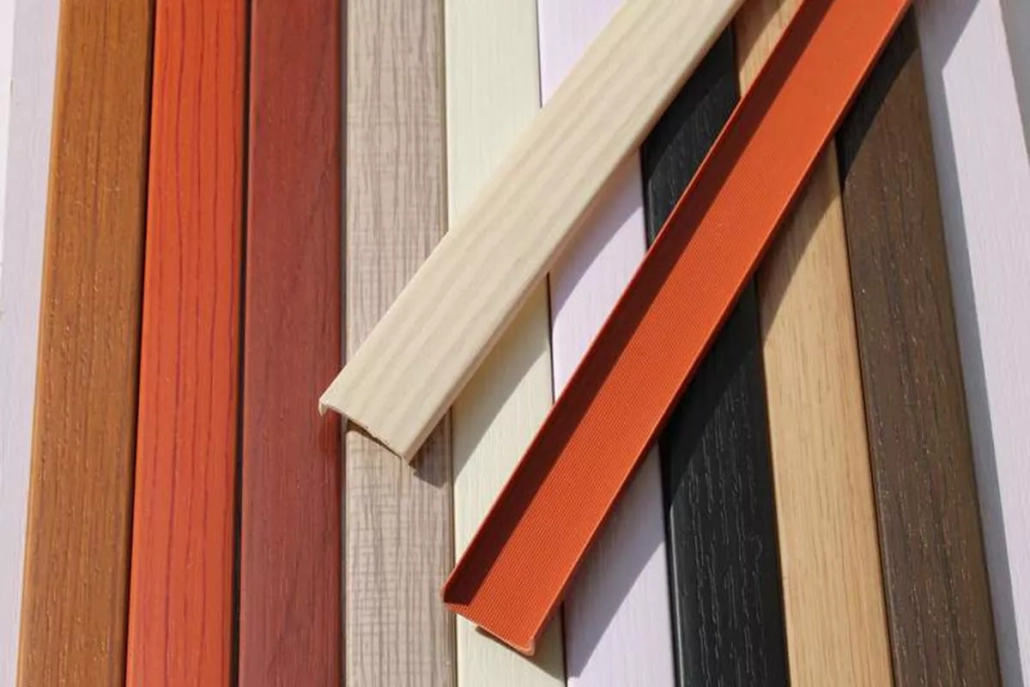
PVC edge banding is a thin strip of material, usually, PVC (Polyvinyl Chloride), used to cover the raw edges of wood panels to give them a finished look. This not only enhances the aesthetic appeal of the furniture but also protects the edges from wear and tear.
When to Use Iron-On Edge Banding
- DIY Furniture Projects: Home enthusiasts working on custom furniture or shelving units often find PVC edge banding a game-changer for achieving professional finishes.
- Refurbishing Old Furniture: When reviving or upcycling old furniture, iron-on edge banding can help to cover up chipped or worn edges.
- Professional Woodworking: In a professional setting, edge banding is a standard practice for creating high-quality furniture and cabinetry.
Step-by-Step Guide to Applying Iron-On Trim Tape PVC Edge Banding:
Tools and Materials You’ll Need to Applying Iron-On Trim Tape PVC Edge Banding
- Iron-on PVC edge banding
- A regular clothes iron
- A flat work surface
- A trimming tool or a sharp utility knife
- Fine-grit sandpaper
- A clean, dry cloth
Step 1: Preparing the Surface
- Case Study: Consider a DIY bookshelf project. Before applying the banding, ensure that all edges of the shelves are smooth and free from dust.
When embarking on a DIY bookshelf project, applying iron-on trim tape PVC edge banding is a critical step in achieving a professional and polished finish. This process, though straightforward, requires attention to detail and preparation to ensure success.
Case: Preparing the Bookshelf for Edge Banding
A: Assessing and Smoothing the Edges
Before you can even think about ironing on the edge banding, the initial focus should be on preparing the edges of your bookshelf shelves. It’s essential that these edges are perfectly smooth and free from any dust or debris. Any imperfections can lead to a less-than-satisfactory finish, compromising both the appearance and durability of the edge banding.
For a DIY enthusiast working on a homemade bookshelf, this might involve using sandpaper to smooth out the edges. Begin with a coarser grit to quickly deal with any unevenness or splinters and gradually move to a finer grit for a smooth finish. The goal is to create a clean, level surface for the edge banding to adhere to.
B: Thorough Cleaning
Once the edges are sanded and feel smooth to the touch, the next step is to ensure they are impeccably clean. Dust and wood particles can interfere with the adhesive on the edge banding, leading to a weak bond or an uneven application. Using a clean cloth, wipe down the edges to remove all traces of dust. For those in a woodworking shop, an air compressor can be used to blow off any remaining dust particles, ensuring a pristine surface.
Step 2: Measuring and Cutting the Banding
- Real-Life Example: For a kitchen cabinet refurbishment, measure the cabinet’s edges and cut the banding to length, allowing extra for trimming.
Accurate Measurement for Perfect Alignment
Start with Precise Measurements: The first step is to carefully measure the length of each edge of the cabinet where the banding will be applied. This should be done with a reliable tape measure or ruler. Accuracy here is key, as even slight miscalculations can lead to gaps or overlaps in the banding.
Marking the Banding: Lay out the PVC edge banding and mark it according to the measurements you’ve taken. Remember, it’s better to err on the side of caution by leaving a bit extra rather than cutting too short. An additional half-inch on each end can save you from the frustration of a shortfall and can be easily trimmed off later for a snug fit.
Cutting with Precision: Using a sharp utility knife or scissors, cut the banding at the marked points. Ensure that your cuts are straight and clean. Uneven or jagged cuts can lead to improper sealing and an unprofessional finish.
Real-Life Application in Kitchen Cabinet Refurbishment
When it comes to refurbishing kitchen cabinets, the application of PVC edge banding plays a crucial role in the overall aesthetic:
Cabinet Doors and Drawers: Measure each door and drawer edge separately, as dimensions can vary, especially in custom or older cabinetry. When cutting the banding for these parts, precision is crucial for a seamless look.
Handling Variations: In older cabinets, where edges might not be perfectly straight or might have worn down unevenly, take extra care in measuring. It might be necessary to measure at multiple points along an edge and use the largest measurement to ensure complete coverage.
Step 3: Heating the Iron
- Tip: No steam is needed, just dry heat. Test the iron on a scrap piece first to find the optimal temperature.
Setting Up the Iron for Edge Banding
Choosing the Right Iron Setting: The iron you use doesn’t need to be anything special – a regular clothes iron will do. However, the setting is important. Turn off any steam settings, as moisture is not needed and can interfere with the adhesive. Instead, set your iron to medium to high dry heat. This is typically sufficient to melt the adhesive without damaging the PVC tape.
Testing the Heat: Before you begin applying the edge banding to your actual project, it’s wise to test the iron’s temperature. Use a scrap piece of the same PVC edge banding on a spare piece of wood. This trial run will help you gauge whether the iron is hot enough to melt the adhesive without scorching the PVC material. Adjust the iron’s temperature as needed based on this test.
Practical Application: Ensuring Optimal Adhesion
In a DIY Project: Say you’re working on a homemade bookcase and it’s time to apply the edge banding. After testing the iron on a scrap piece, you can confidently apply it to the bookcase edges, knowing that the temperature is just right to secure the banding in place.
In a Professional Workshop: For professional woodworkers or cabinet makers, this step is routine. They might have a specific iron dedicated to edge banding, with the temperature dialed in for consistent results across various projects.
Step 4: Aligning the Edge Banding
- Scenario: When working on a custom particleboard desk, align the banding carefully, ensuring it extends slightly on either side of the edge.
Precision in Placement for a Flawless Finish
Careful Alignment: Begin by taking the pre-cut strip of PVC edge banding and gently position it along the edge of the desk. It’s essential to align the banding so that it is centered over the edge, with a slight overhang on both the top and bottom. This overhang is critical as it ensures that the entire edge will be covered once the banding is adhered.
Checking for Consistency: As you align the banding, periodically step back and check that it remains straight and consistent along the length of the edge. Any misalignment at this stage can lead to a less-than-satisfactory finish, with potential gaps or overhangs that are difficult to correct later.
Real-Life Application: Custom Particleboard Desk
In a DIY Home Project: For instance, if you’re updating a home office with a custom-built particleboard desk, this alignment step is where your attention to detail will pay off. Carefully laying the banding along the raw edge of the desk, making sure it’s perfectly aligned, sets the foundation for a professional-looking edge finish.
In a Professional Woodworking Scenario: In a professional setting, where custom furniture is being created, this step is just as crucial. Woodworkers will meticulously align the banding, ensuring that it is perfectly centered for an even and clean finish that meets the high standards expected in custom furniture.
Step 5: Applying the Banding with the Iron
- Professional Insight: In a woodshop, applying the banding evenly with the iron ensures a secure and bubble-free bond.
Ensuring an Even and Secure Bond
Even Application of Heat: Once the iron reaches the optimal temperature (as determined in the previous steps), begin applying the banding. Press the iron against the edge banding, starting at one end and slowly moving along its length. It’s essential to apply even pressure and maintain steady movement to ensure the heat is uniformly distributed. This uniform heat application activates the adhesive on the banding, allowing it to bond securely to the edge of the furniture piece.
Avoiding Bubbles and Irregularities: As you move the iron along the banding, be vigilant for any signs of bubbling or irregularities. If any areas aren’t bonding properly, gently re-iron them, ensuring the heat and pressure are evenly applied. The goal is to achieve a smooth, bubble-free bond that firmly adheres the banding to the edge.
Professional Insight from a Woodshop Perspective
In a Professional Setting: In a woodshop, where the quality of finish is paramount, this step is done with great care. Professionals might use specialized tools or techniques to ensure the banding is applied flawlessly. For instance, they might use a roller behind the iron to press down the banding as it cools, ensuring a tight bond and a smooth finish.
Step 6: Trimming the Excess
- Tip from the Field: Use a special edge banding trimmer or a sharp knife for precision cutting.
Choosing the Right Tool for Precision Trimming
Using an Edge Banding Trimmer: For best results, a specialized edge banding trimmer is highly recommended. These trimmers are designed to cut the excess banding precisely, leaving a smooth, flush edge that aligns perfectly with the surface of your furniture. The trimmer typically clamps onto the edge of the panel, and as you slide it along, it neatly trims the overhanging banding.
Alternative: Using a Sharp Knife: If you don’t have an edge banding trimmer, a sharp utility knife or a chisel can also do the job. The key here is to use a steady hand and a sharp blade for clean cuts. Gently run the blade along the edge of the banding, being careful not to gouge the wood or the banding itself.
Step 7: Finishing Touches
- Detailing: Sanding the edges gently ensures a seamless transition between the banding and the wood surface.
Sanding for Smoothness and Uniformity
Gentle Sanding Process: After the excess banding has been trimmed, the next step is to sand the edges lightly. This is done to remove any rough spots or slight overhangs, ensuring that the edge banding is flush with the surface of the wood. Use a fine-grit sandpaper for this process, as coarse sandpaper can damage the banding or the surface of the furniture.
Ensuring Evenness: As you sand, run your fingers along the edge to feel for any bumps or ridges. The goal is to achieve a smooth, even surface where the transition between the banding and the wood is barely perceptible. This attention to detail can significantly enhance the overall look and feel of the furniture piece.
Best Practices and Tips
Consistent Pressure and Movement
Steady Ironing Technique: One of the key aspects of applying the edge banding is the ironing process. It is crucial to move the iron slowly and steadily along the length of the banding. This consistent movement and pressure ensure that the heat is evenly distributed, which is necessary for the adhesive to melt uniformly and bond properly to the wood surface.
Avoid Overheating: Moving the iron too quickly or not applying enough pressure can lead to inadequate bonding, whereas lingering too long in one spot can cause the PVC to overheat and potentially warp. It’s about finding that balance to ensure the entire strip is securely attached.
Allowing for Proper Cooling
Patience in Cooling: After the banding has been ironed on, it’s important to allow it sufficient time to cool and set before moving on to trimming. This cooling period solidifies the adhesive, creating a strong bond between the banding and the furniture edge.
Handling with Care: During this cooling phase, avoid touching or moving the banding. Disturbing it too soon can weaken the bond or cause the banding to shift, resulting in a less than perfect finish.
Regular Cleaning of the Iron
Maintaining the Iron: Regularly clean the iron’s surface to prevent the build-up of adhesive residue, which can interfere with its performance. A clean iron ensures a clean application each time you use it for edge banding.
Conclusion
Iron-on trim tape PVC edge banding is a straightforward yet effective way to enhance the appearance and durability of wood furniture and panels. Whether you’re a DIY enthusiast or a professional woodworker, mastering the art of applying PVC edge banding is a valuable skill. With patience and attention to detail, you can achieve a professional-looking finish that stands the test of time.


Leave a Reply
Want to join the discussion?Feel free to contribute!